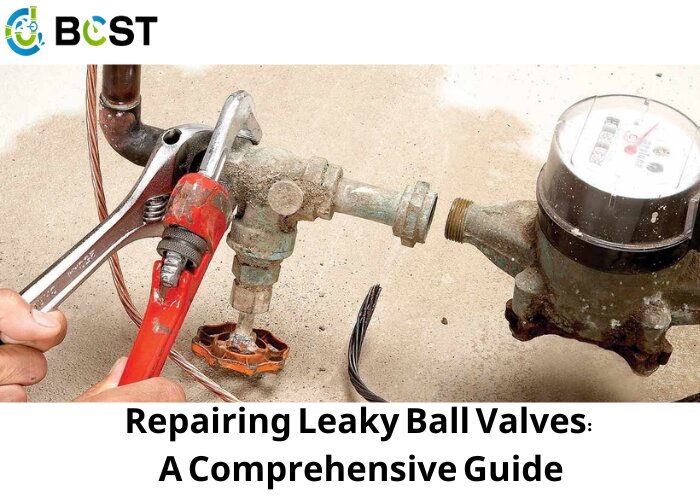
Welcome to our comprehensive guide on repairing leaky ball valves! If you’ve ever encountered the frustrating issue of a leaking ball valve, you’re not alone. In this blog, we’ll walk you through the step-by-step process of fixing this common problem, empowering you with the knowledge and skills needed to tackle it head-on.
A ball valve is a shut-off valve that directs fluid flow using a rotary ball with a hole. There are a few potential ball valve failures, such as getting stuck, fluid leakage, corrosion, and overheating, resulting in the valve not functioning correctly. Typically, there are three cases:
- Ball valve issues that can be fixed manually:Issues like a stuck ball valve that prevents fluid flow, sediment, and dirt buildup as we discussed in our “Ball Valve Problems and Troubleshooting” article, if there is a problem with the actuator, the valve can be difficult to open and close, or it can be easily solved by manual intervention.
- Ball valve issues that can be resolved by changing a part:Problems such as a partially closed ball valve, worn-out O-rings, and stems may necessitate the replacement of certain pieces of the ball valve rather than ordering a new valve.
- Ball valve issues that require a total replacement:Certain issues, like a leaking ball valve, may need replacing the whole valve with a new one.
The following is an example of replacing a ball valve on a water line with a new one.
Step 1: Turn off the water.
Turn off the main water supply to all of the pipes that are being repaired. Then, turn on the linked faucet to drain the existing water pressure in these pipes.
Step 2: Access the pipes.
To replace an existing ball valve, access to the pipes is required.
A sink: Attempt to reach the ball valve beneath the sink.
Shower pipe/bathtub faucet: Either through the basement crawlspace or by breaking through the wall to which the pipe is attached.
This step helps plan whether to break the wall to replace the required valve.
Step 3: Cut the old valve out.
Once you have complete access to the pipes, use a hacksaw to cut off the old ball valve that is still in the pipe. Cut the two sides of the pipe where the valve is located and remove the valve from its position. Remove the old valve if it can be unscrewed from its location and proceed to Step 8.
Step 4: Disassemble the ball valve.
Disassemble the ball valve parts while keeping all of them connected. If any of the individual pieces are salvageable, this guarantees that the reassembling procedure may be completed swiftly.
Step 5: Inspect the ball valve parts.
Inspect the ball valve parts for any cracks or wear and tear that may have caused the ball valve to leak or become inoperable. If a certain component of the valve appears to be problematic while the remainder appears to be fine and functioning properly, ordering a replacement part is the best alternative. After replacing the broken part, reinstall the ball valve sections with lubricating oil and screws. If there is damage to many portions of the valve, or if the ball valve appears to be beyond repair, it is best to replace it entirely.
Step 6: Purchase a replacement valve or valve part, as well as any additional materials required.
Have an idea about the type of pipes installed so it is easy to buy a new pipe section and the seals required.
- Copper pipe: Plumber’s tape or sweat pipe connections
- PVC pipe: Pipe cement
Also, depending on the situation, obtain a spackle and a new valve or valve part(s).
Step 7: Splice the pipe.
Connect the replacement pipe segment to the pipe where the valve was removed. Make enough room for the new ball valve to fit.
- PVC pipe: Apply PVC glue to the current pipe and one end of the new pipe where the cut was done. Push the new pipe onto the older pipe and hold it in place for about 30 seconds. If necessary, connect a coupler to one end of the new pipe.
- Copper pipe: Plumber’s tape or sweat pipe connections
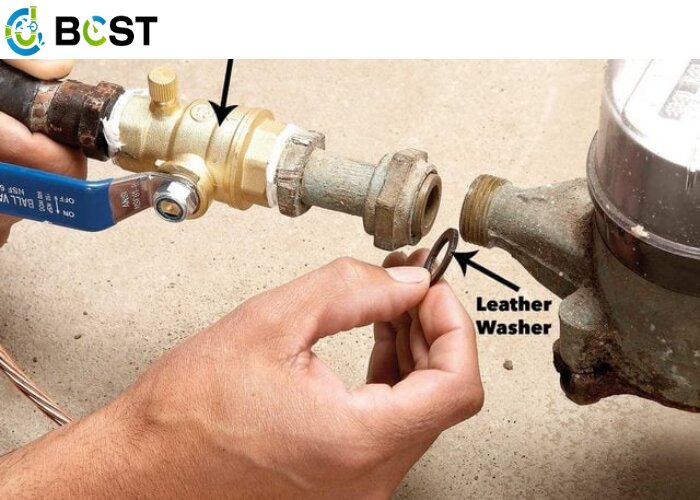
Step 8: Install the new/repaired ball valve.
Install the new/repaired ball valve into the pipe correctly.
- Copper pipes must normally be soldered to the valve.
- To install a ball valve in a PVC pipe, use pipe dope to cover one end of the pipe and put the ball valve into the pipe. Then, apply pipe dope to the other end of the pipe and insert a new valve port.
- Welded connections are utilized for ball valves in high-pressure and high-temperature applications where minimal leakage is critical. Welded connections are permanent and should only be performed by qualified individuals.
- Threaded connections aid in the installation of tiny valves in pipes. The valve’s female threaded ends are typically connected to a male-threaded component. The valve may have two male-threaded ends or one male-threaded end and one female. Straight or tapered threaded connectors are available. To create a tight seal between the valve and the pipe, explicit connections frequently require an O-ring that compresses. To achieve a tight seal, the tapered thread does not require an O-ring. Pipe tape or a sealant can be used between the male and female threads in both thread types to function as a lubricant, provide sealing, and avoid metal-to-metal interactions that cause wear.
- Ball valves with flanged connections are simple to install and remove for cleaning and maintenance without interfering with other pipe network components. They are widely used in industrial settings. The flanges are solid metal plates with holes for bolts and nuts to tighten the valve to the pipe.
Step 9: Test the ball valve installation.
Turn on the water supply and any faucets that had been turned off during the installation. Examine the pipes for leakage. The fractured walls that house the pipes can be closed if there are no leaks. Return to the steps and make the necessary connections if the pipes leak.
If the wall had to be cut, reattach it and paint over it with spackle. Close the cabinets if the valve is beneath the sink.
Final Thoughts
Mastering the art of repairing leaky ball valves is a valuable skill that can save you both time and money. By following our comprehensive guide, you’ve gained insights into identifying the issue, understanding the components involved, and executing effective repairs. Remember, a well-maintained ball valve ensures the smooth operation of your plumbing systems, preventing unnecessary leaks and water wastage. Armed with this knowledge, you can confidently tackle any leaking ball valve issue that comes your way. Here’s to a leak-free and efficiently functioning plumbing system!